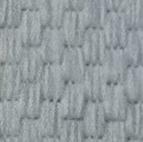
This stitch creates an interesting pattern, suitable for backgrounds. This stitch should always be worked using straight stitches that are four canvas threads in length. Two diagrams have been used to demonstrate this stitch.
ALGERIAN
FILLING STITCH
The Algerian Filling Stitch is a straight stitch that is quick and easy to work.
Algerian Filling Stitch
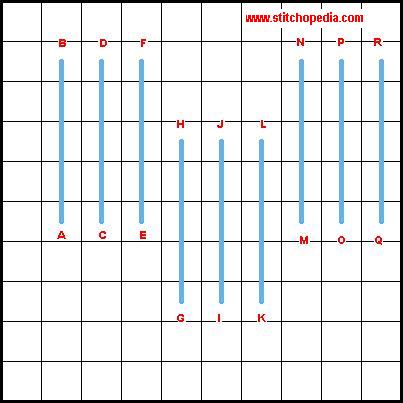
(Diagram 1):
Bring the needle up at A, move up over four canvas threads, bring the needle down at B. Bring the needle up at C, move up over four canvas threads, bring the needle down at D. Bring the needle up at E, move up over four canvas threads, bring the needle down at F. Bring the needle up at G, move up over four canvas threads, bring the needle down at H. Bring the needle up at I, move up over four canvas threads, bring the needle down at J. Bring the needle up at K, move up over four canvas threads, bring the needle down at L. Bring the needle up at M, move up over four canvas threads, bring the needle down at N. Bring the needle up at O, move up over four canvas threads, bring the needle down at P. Bring the needle up at Q, move up over four canvas threads, bring the needle down at R. This completes the first row of algerian filling stitches. Now, continue on to Diagram 2...
Algerian Filling Stitch (Diagram 2):
The second row is worked in exactly the same manner as the first row. The second row has been illustrated in Dark Blue above. As you can see from the diagram, shorter stitches should be worked when larger stitches will not fit - specifically, when you reach the end of the canvas or area that you are working on. Reminder: The basics algerian filling stitches should be four canvas threads long.
 | ||||||
Stitch-opedia
An encyclopedia of needlepoint Stitches...

Copyright 2006...Stitchopedia...All Rights Reserved
*Stitch Index*
Select the first letter of the stitch you are looking for...
*Stitch Index*
Select the first letter of the stitch you are looking for...
| ||||||